- EE Academy
- Accounting
- General Ledger: Base Elements
-
Feature Updates
-
FAQs
-
Getting Started
-
Assisted Setup: Concierge Service
-
Main Menu
-
Unit Management
-
Admin Permissions
-
Application Management
-
Application Processing
-
Income Certification
-
Resident Management
-
Accounting
-
Task Management
-
Work Orders
-
Charges & Payments
-
Reporting
-
Prospects
-
Appointments
-
Marketing Leads
-
Visitors
How to Add or Create Vendors

To create or add a Vendor, please follow the steps below.
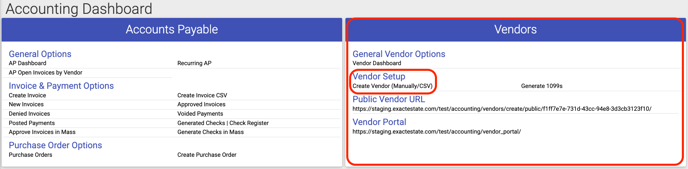
Step 1. Navigate to the Accounting Dashboard under the Main Menu.
Step 2. There are 3 options to add a Vendor.
- Option 1: Copy & share the Public Vendor URL to allow Vendors to enter in their information directly.
- Option 2. Via CSV
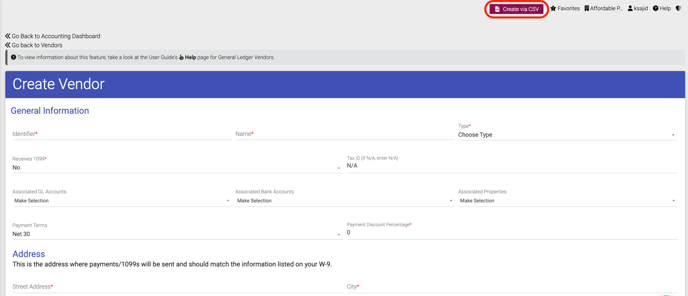
- On the right under Vendors, click Create Vendor (Manually/CSV).
- Click Create via CSV
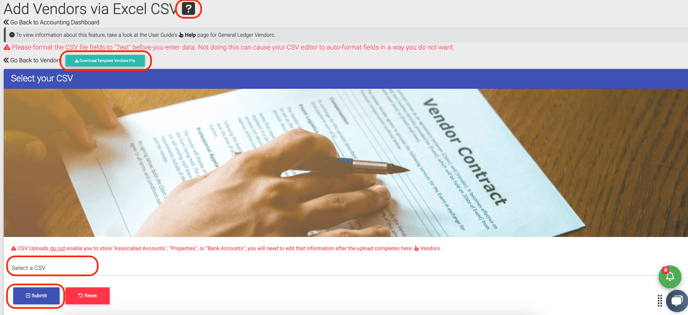
- Use the black question mark to view the validation rules and click "Download Template Vendor File".
- Fill in the required data and select the completed CSV to upload.
- Click Submit.
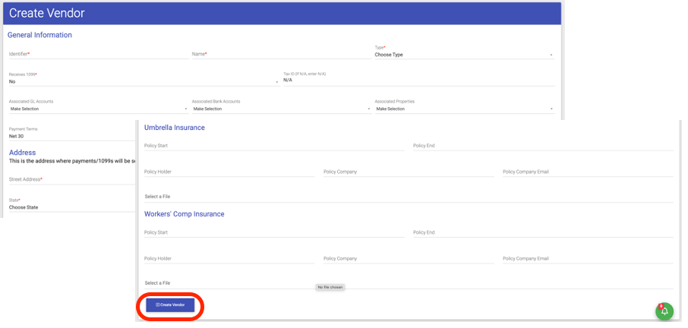
- Option 3. Manually
- Fill in the Vendor information
- General info, Insurance info, etc.
- Click Submit
- Fill in the Vendor information

To create or add a Vendor, please follow the steps below.
Step 1


Step 2
Option 1: Direct Vendor Sign Up


Option 2: Via CSV
Option 3: Manual Single Entry